Autopilot Behavior Box
A modular box for training mouse-sized animals
| Modality | Enclosures |
|---|---|
| Build Guide Type | Construction Build Guide |
| Creator | Jonny Saunders |
| Version | 2 |
| Submitted Date | 2021-06-10 |
Ingredients
Materials
| Name | Quantity | Dimensions | Manufacturer | Product ID | Price | Page | Datasheet |
|---|---|---|---|---|---|---|---|
| 80/20 - 1010 | 8, 4 | 10", 8" | 80/20 | 1010 | |||
| Cast Acrylic | 1, 5 | 10x10", 8x8" | EPlastics | [1] | |||
| Neodymium Magnet | 16 | 3/16" x 3/8" | K&J Magnetics | D36 | 0.54 | [2] | |
| T-Frame End Fastener | 16 | 1/4-20 | 80/20 | 3682 | 2.3 | [3] |
Tools
| Name | Tool Kind | Dimensions | Manufacturer | Product ID | Datasheet |
|---|---|---|---|---|---|
| Drill Press | Drill | ||||
| Laser Cutter | Laser | Universal Laser Systems | VLS4.75 | ||
| Miter Saw | Saw | ||||
| Thread Tapper | Hand Tools Etc. | 1/4" - 20 |
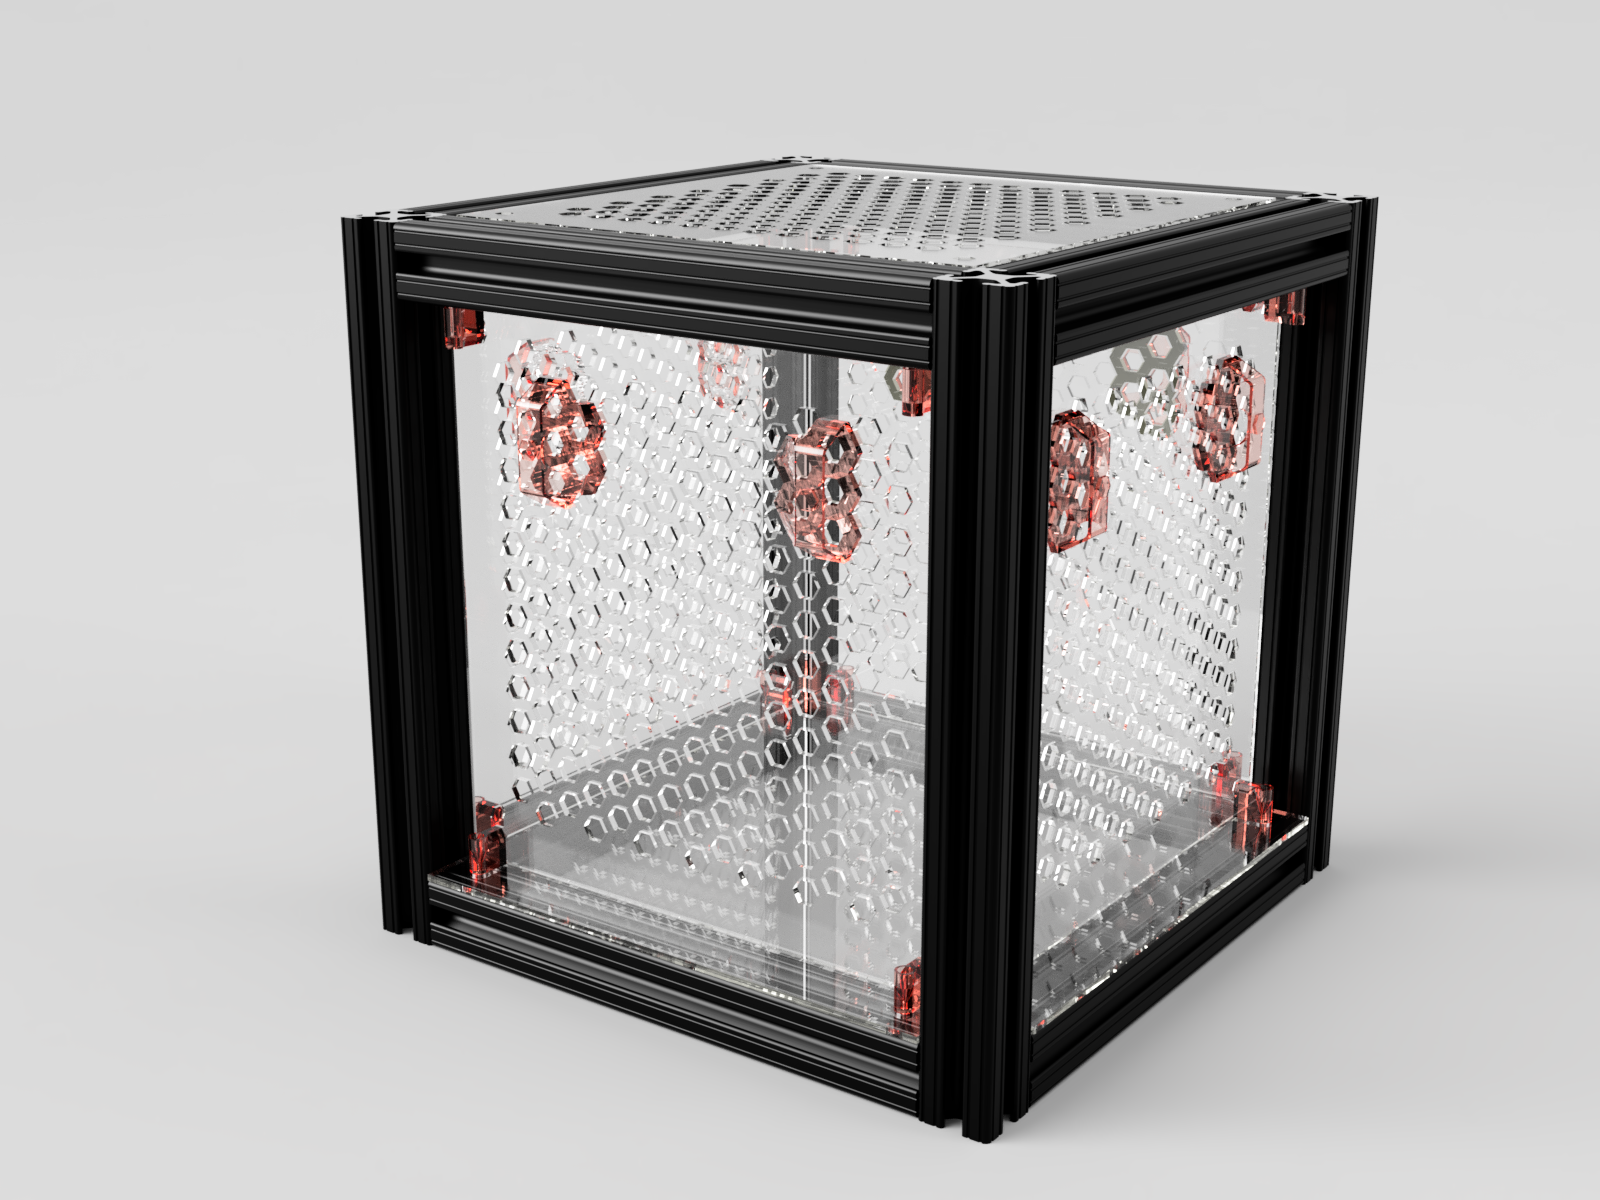
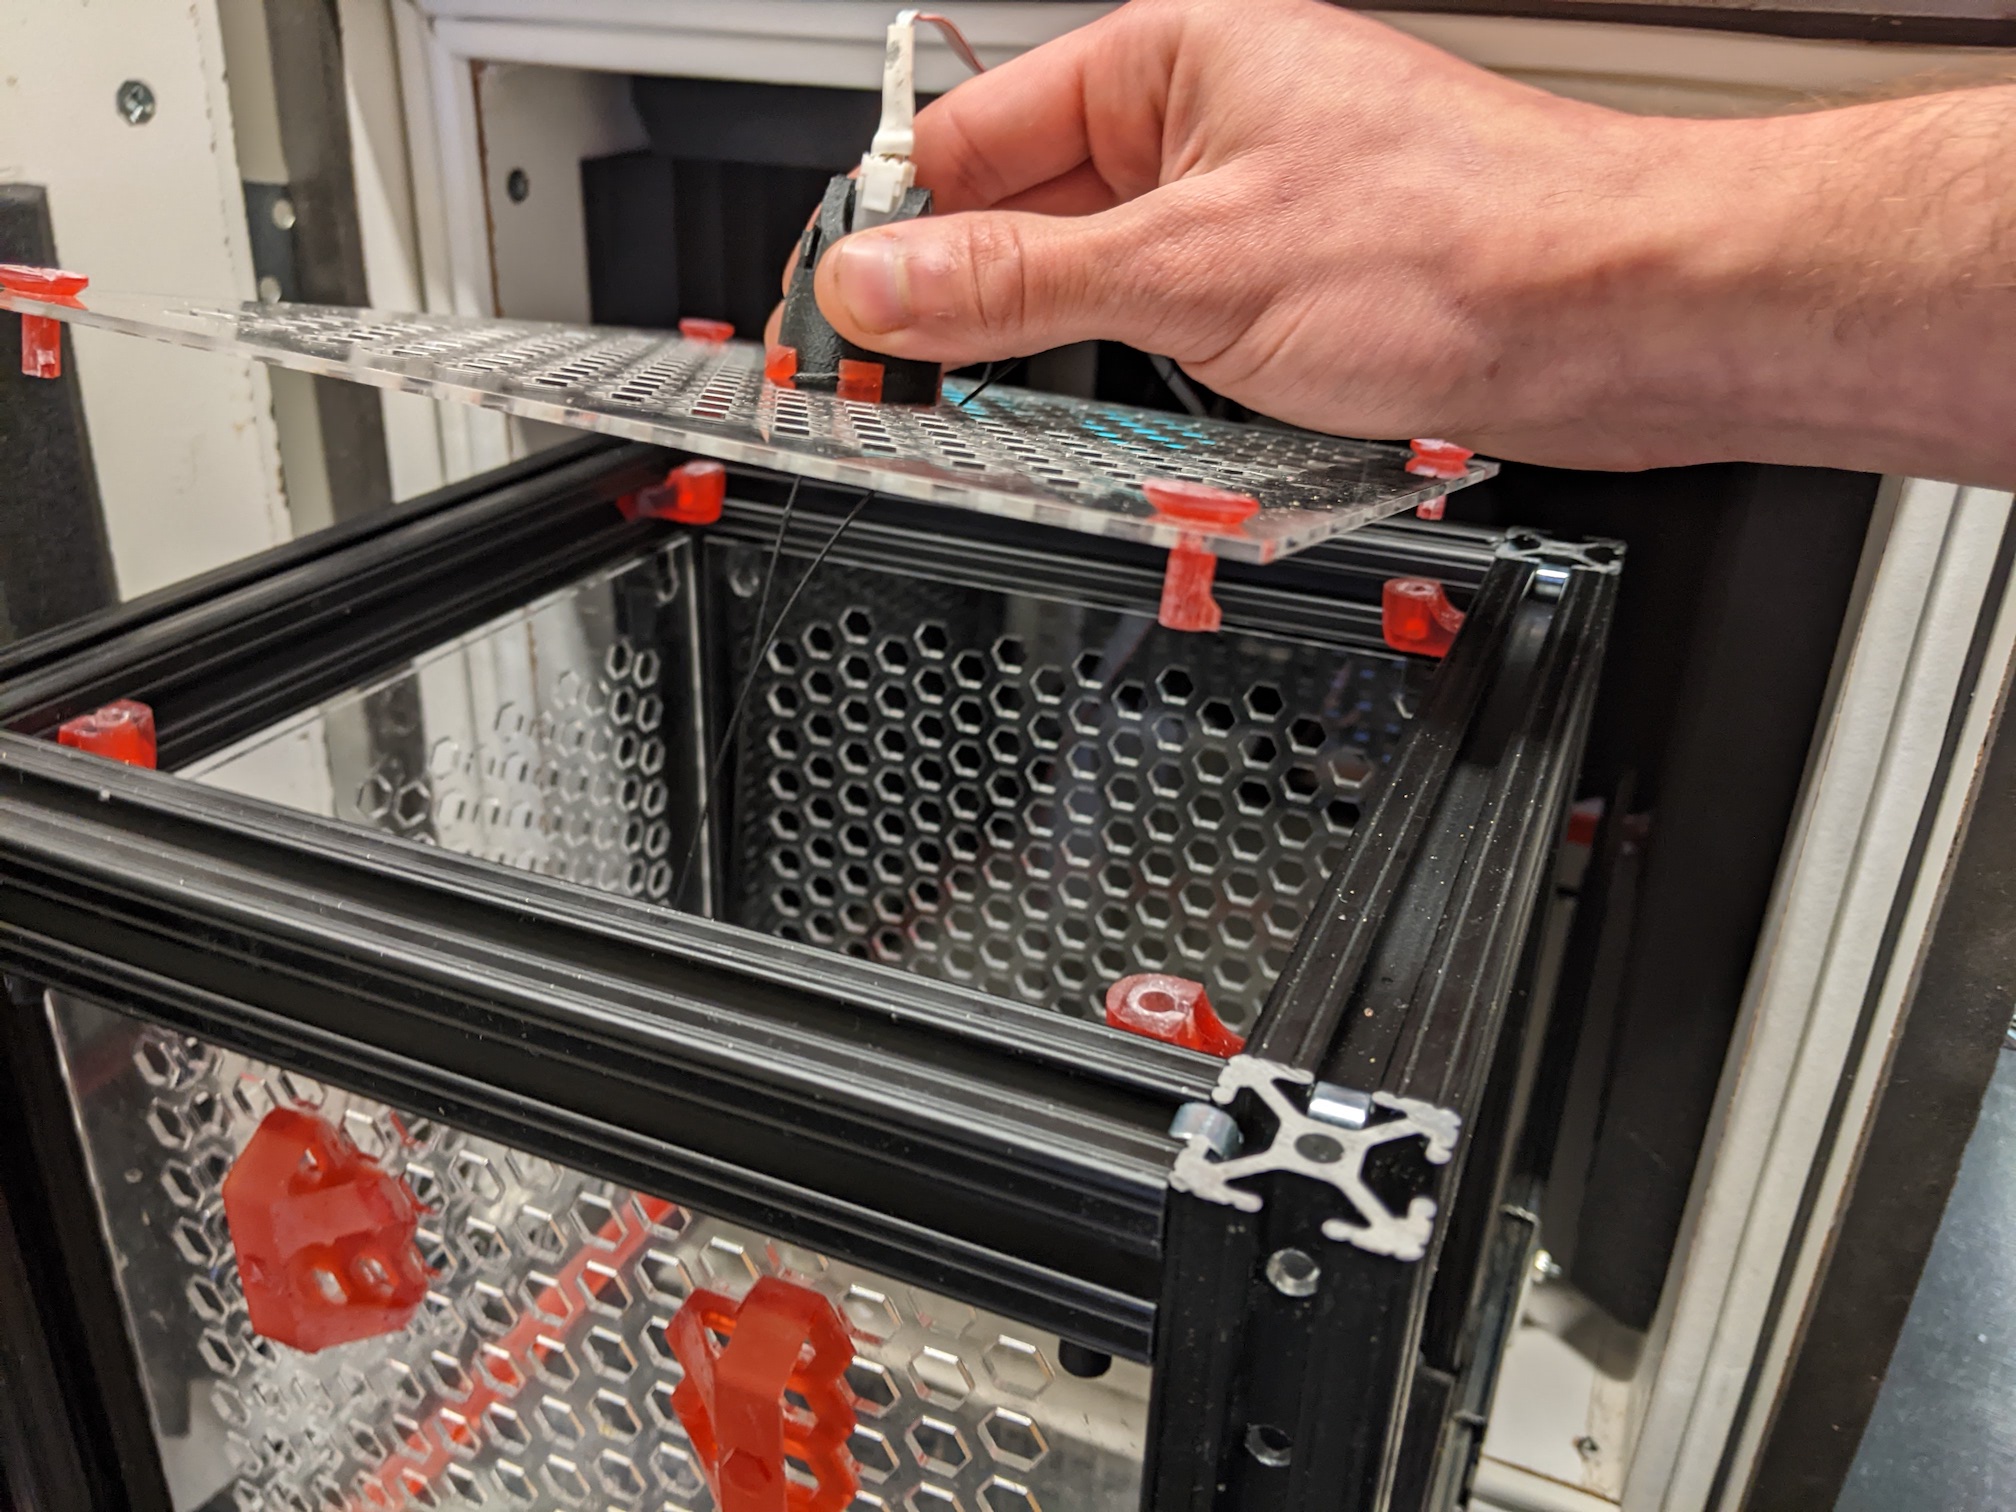
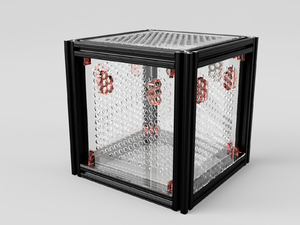
A modular behavior box made of 1" 80/20 - 1010 extruded aluminum and 3/32" thick transparent acrylic sheets. Every panel except the bottom is removable, attached with a combination of slots in the acrylic and magnets. This box is 10"x10"x10", but is adaptable to any size by scaling the cad files
Prepare 80/20
Cut to Size
Cut a length of 1" 1010 size 80/20 (or order to size) into lengths
- 4x 10" - for the vertical beams
- 8x 8" - for the horizontal beams
You can either have the pieces cut to order, or else a mitre saw works just fine. Set a block on the saw to get consistent lengths across cuts, line the piece up on the saw, measure the cut piece, and repeat:
Drill Access Holes
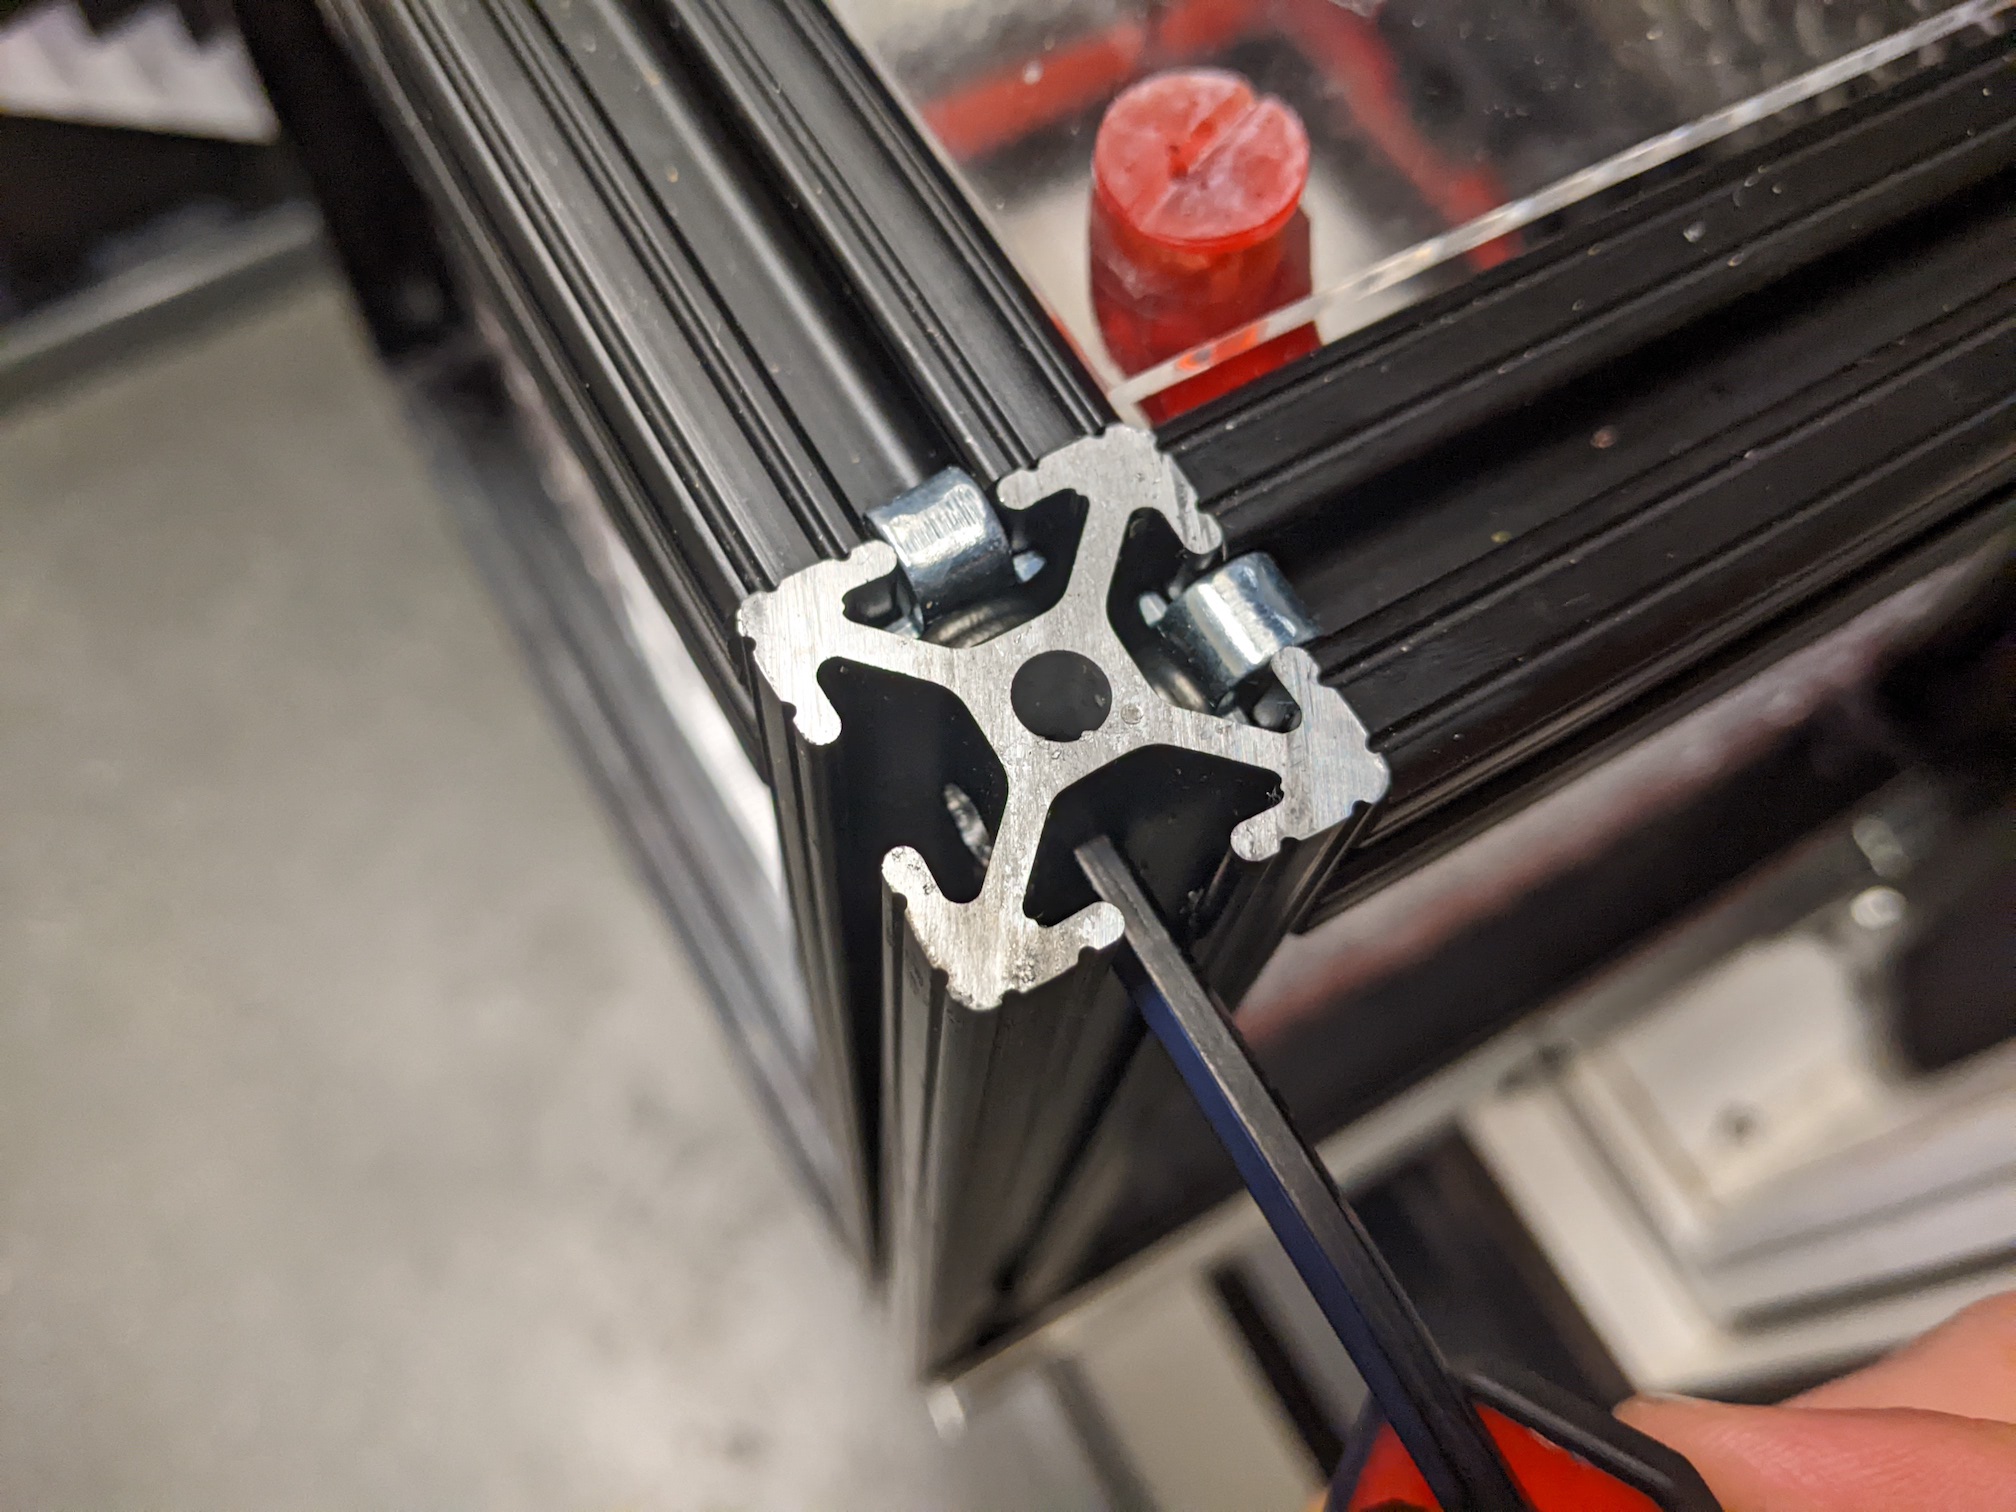
The horizontal beams are connected to the four vertical beams using End Fasteners, which need an access hole to tighten.
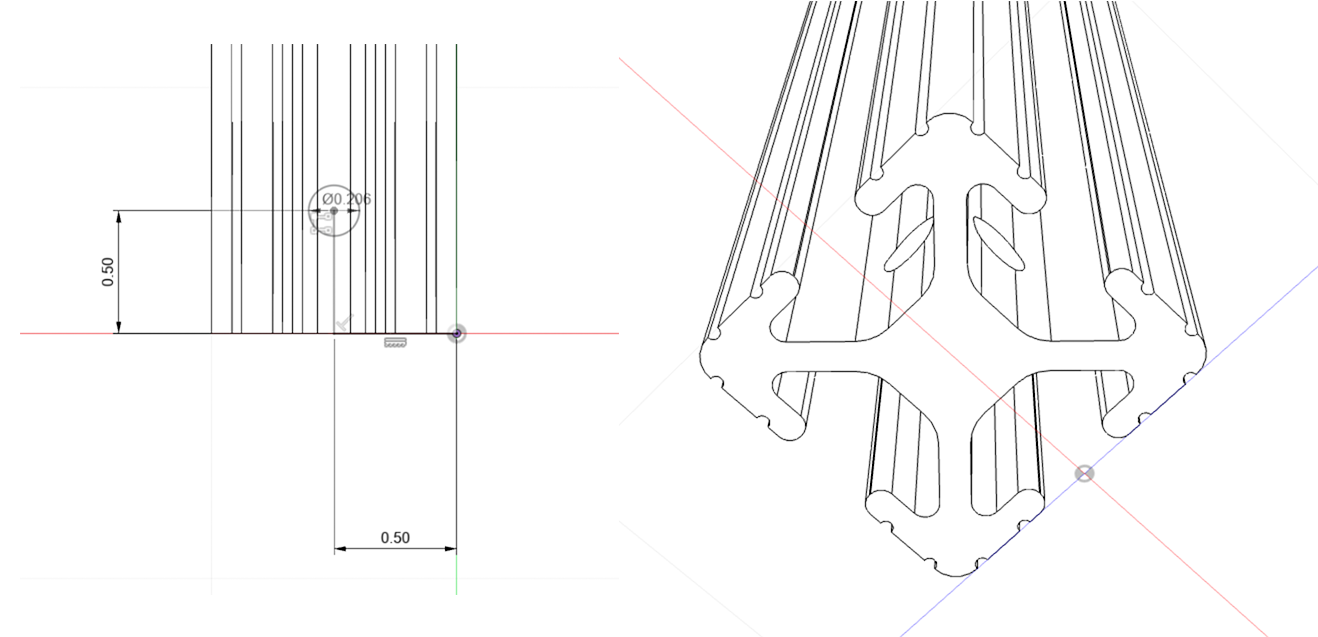
Drill holes from both faces (through all four faces) 0.5" from the end of all four vertical beams. The position and size of these holes do not need to be precise, they just need to allow you to reach a Hex wrench through it to tighten it while the horizontal beam is flush with the end of the vertical beam.
I recommend using a drill press with a clamped jig to position your beams, but doing it by hand with a handheld drill works too ;). When using a drill press, make sure to lubricate the bit before drilling, and if you aren't clamping the piece down make sure that if the bit were to catch that the piece wouldn't hit you or drag your fingers into harms way.
Tap Ends
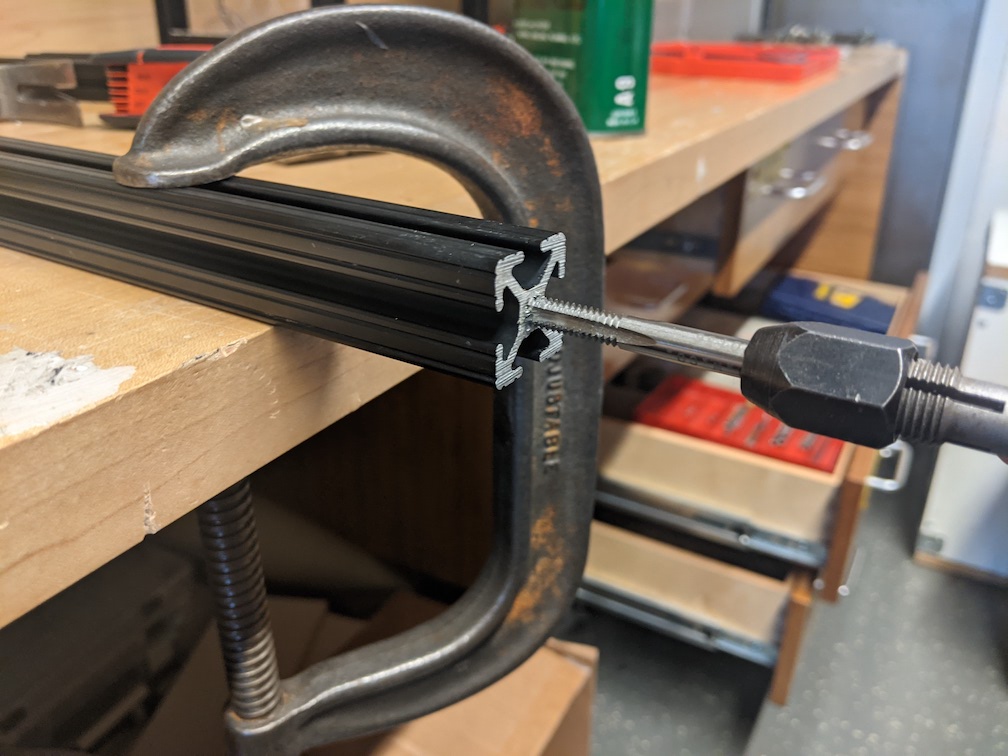
To attach the end fasteners, both ends of all the horizontal beams need to be tapped (cut threads into the inner cylinder). Since we are using 1/4-20 screws in this build, you should use a 1/4-20 tap (but substitute as needed)
This can be done with a tapping stand, but because the 80/20 beams already have the center cylinder extruded through them that guides the tap quite well, so in my experience a handheld tap was perfectly fine. When using a handheld tap, add a drop of cutting oil on the tip, and check from two 90-degree angles (eg. top and side) to make sure the tap stays square through the first few turns. Once the tap catches and starts to cut, the resistance will increase. Turn the tap slowly and consistently, and make sure not to apply any lateral pressure to/bend the tap while turning it or else you will shear it! If the resistance is too high and you are worried about snapping your tap, you can always back it out, clean it off, and go back in.
You only need to tap 3/8" or so, just enough to let you screw down the end nuts.
Prepare Acrylic Panels
Score & Snap Raw Panel
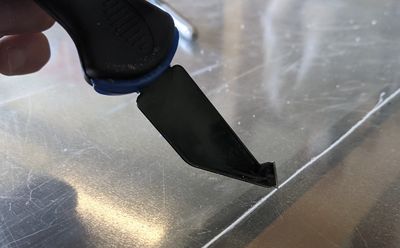
If you are making the acrylic panels yourself, you probably have some huge sheet of plastic that you definitely won't be able to fit inside of your laser cutter. There are plenty of ways to cut acrylic, but one simple and quick way is to score a groove in the surface of the acrylic and then snap the piece off. I like to use an Acrylic Knife and a swift karate-style chop, but any blade and percussive motor pattern should work.
The main advantage of the acrylic knife is that it has both a sharp blade for making the initial line, and then if you invert the blade as pictured below the backside can be used to scrape the plastic out much more quickly. If you are having trouble cutting the acrylic, your blade is dull! Don't waste your time struggling, they're very cheap.
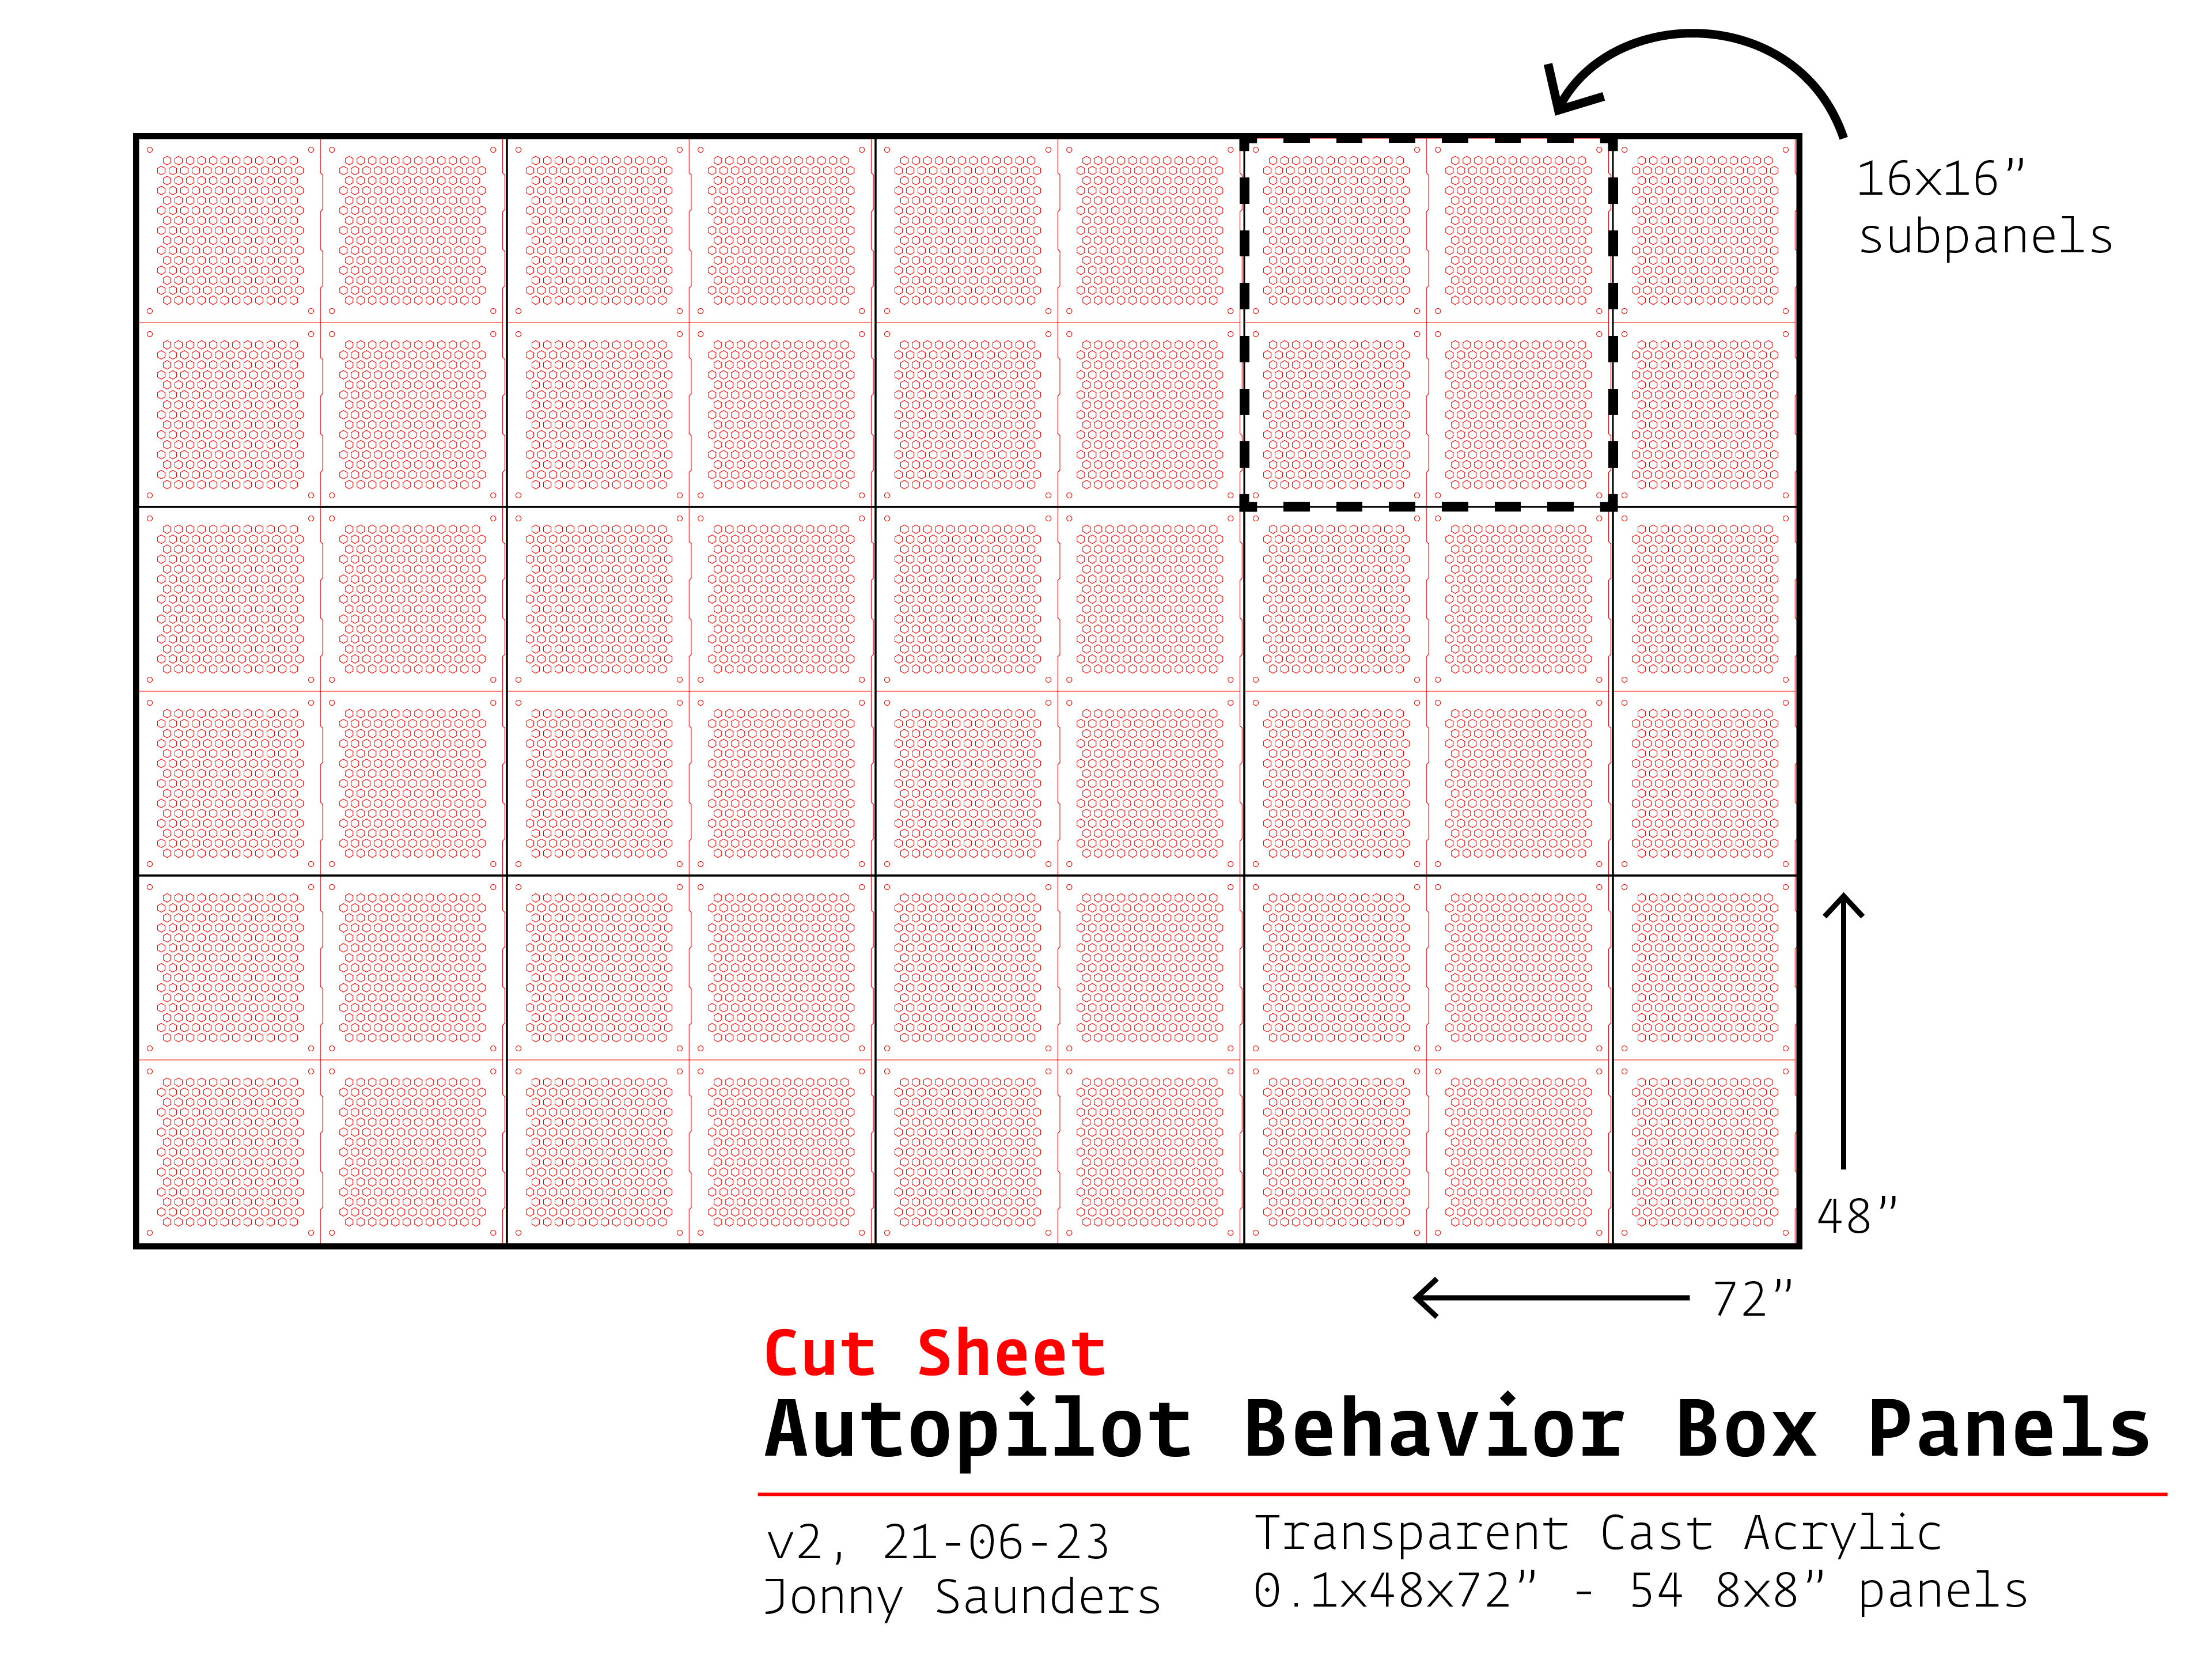
A 48" x 72" sheet can be cut down to 12 16" x 16" and 3 8" x 16" subpanels to make 54 total hex panels.
Laser Cut the Panels
Find your nearest laser cutter! These are usually found in "makerspaces," which tend to be cheaper to access than machine shops. Depending on your build you will need to cut different combinations.
Basic Build:
- 1x Behavior Panel Bottom
- 5x Autopilot Hex Panel
- 1x Autopilot Hex Panel Tripoke (If you plan on using the tripoke panel for your experiments)
Tripoke Build:
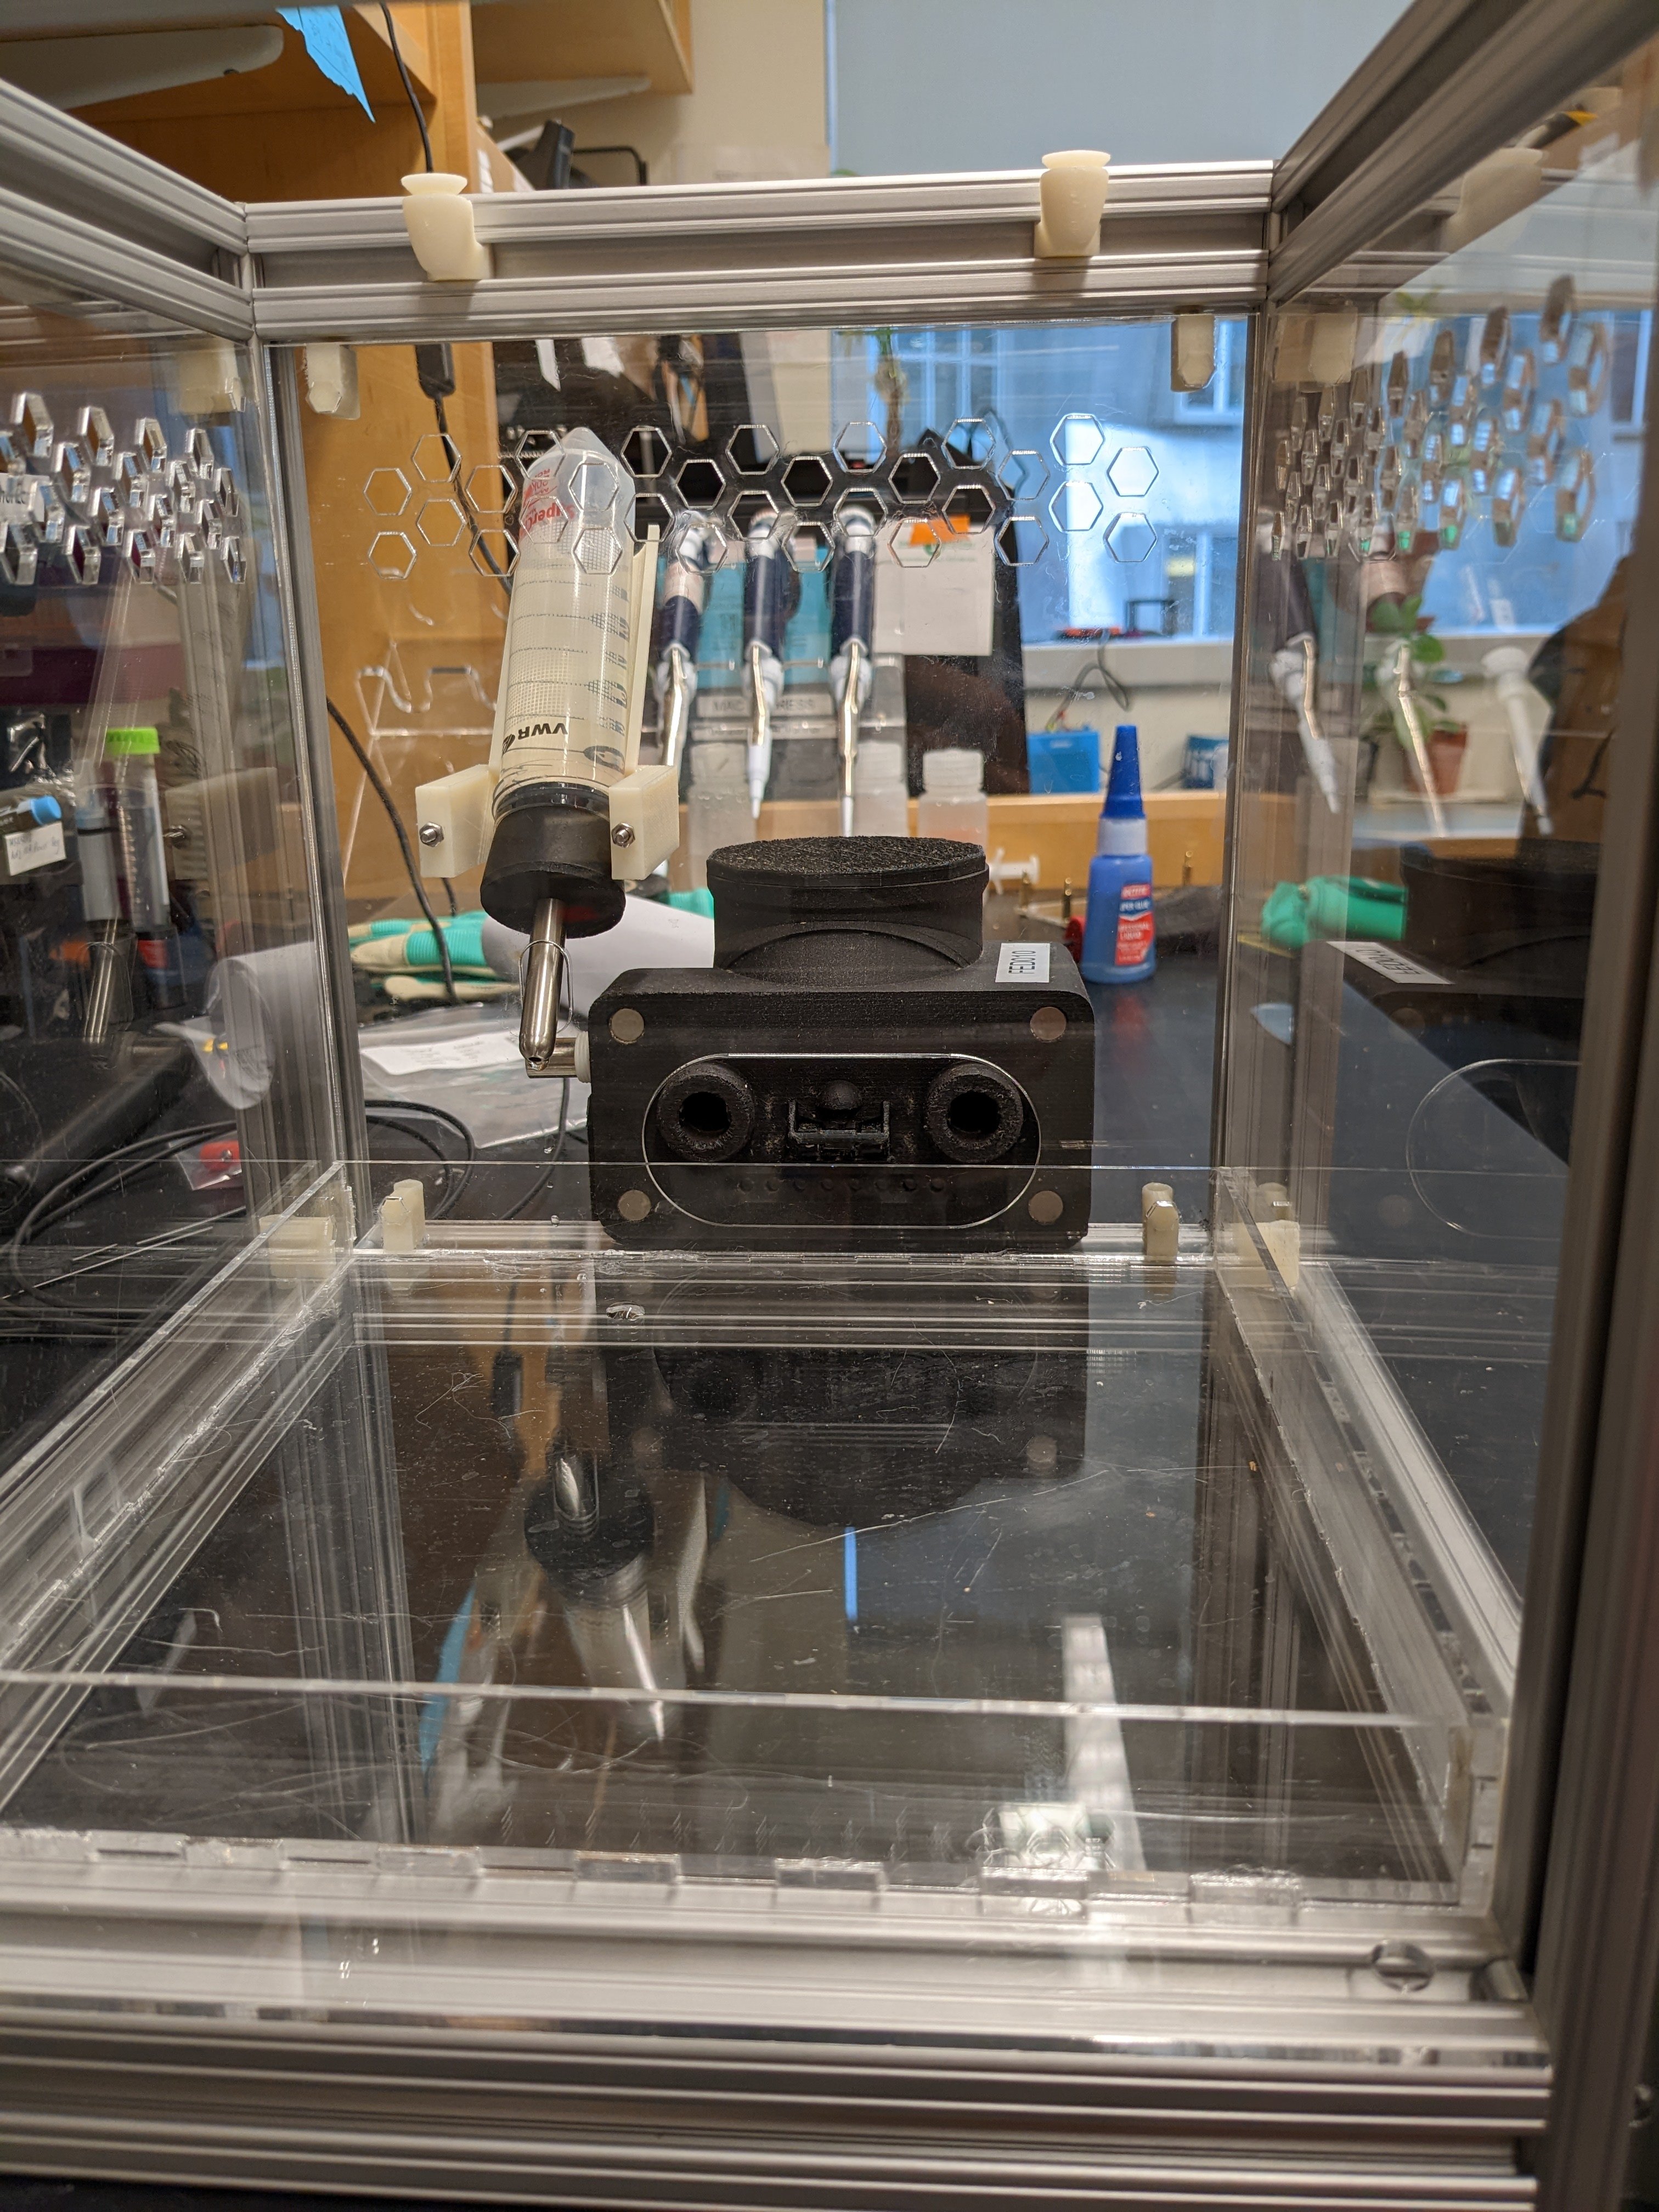
FED3 Build:
For this build, you will also need a FED3, and a water bottle holder.
The end product looks something like this:
Every laser cutter works differently! For the one we have, we load up the .dxf files in autocad, set the lines to a particular weight and color to indicate different colors, and then let er rip.
When cutting the hex panels, you'll want to adjust the laser power and speed to where it just cuts through the acrylic --- if you go too slowly then you'll end up melting the acrylic a bit and getting brown smudges on it (which aren't too bad, and can be cleaned off, but to be avoided if possible)
Attach Pegs & Handles
Print out the pieces you'll need!
- 8x Autopilot Hex Panel Pegs - Magnet Peg
- 8x Autopilot Hex Panel Pegs - Solid Peg
- 8x Autopilot Hex Panel Pegs - Rail Peg
- 4x Autopilot Hex Panel Pegs - Top Brace
- 4x Autopilot Hex Panel Pegs - Top Brace Peg
- 8x Autopilot Panel Handle - Sideways Handles
I like using a Resin/SLA printer because it has much smaller error tolerances for pieces that snap and fit precisely together. If you're using a filament printer, print a few test pieces to make sure the pegs fit into the hexagonal holes in the panels and the rail pieces slide easily into the 80/20 (but with a little resistance so they stay in place) -- if they don't adjust the settings for your printer to compensate for material expansion.
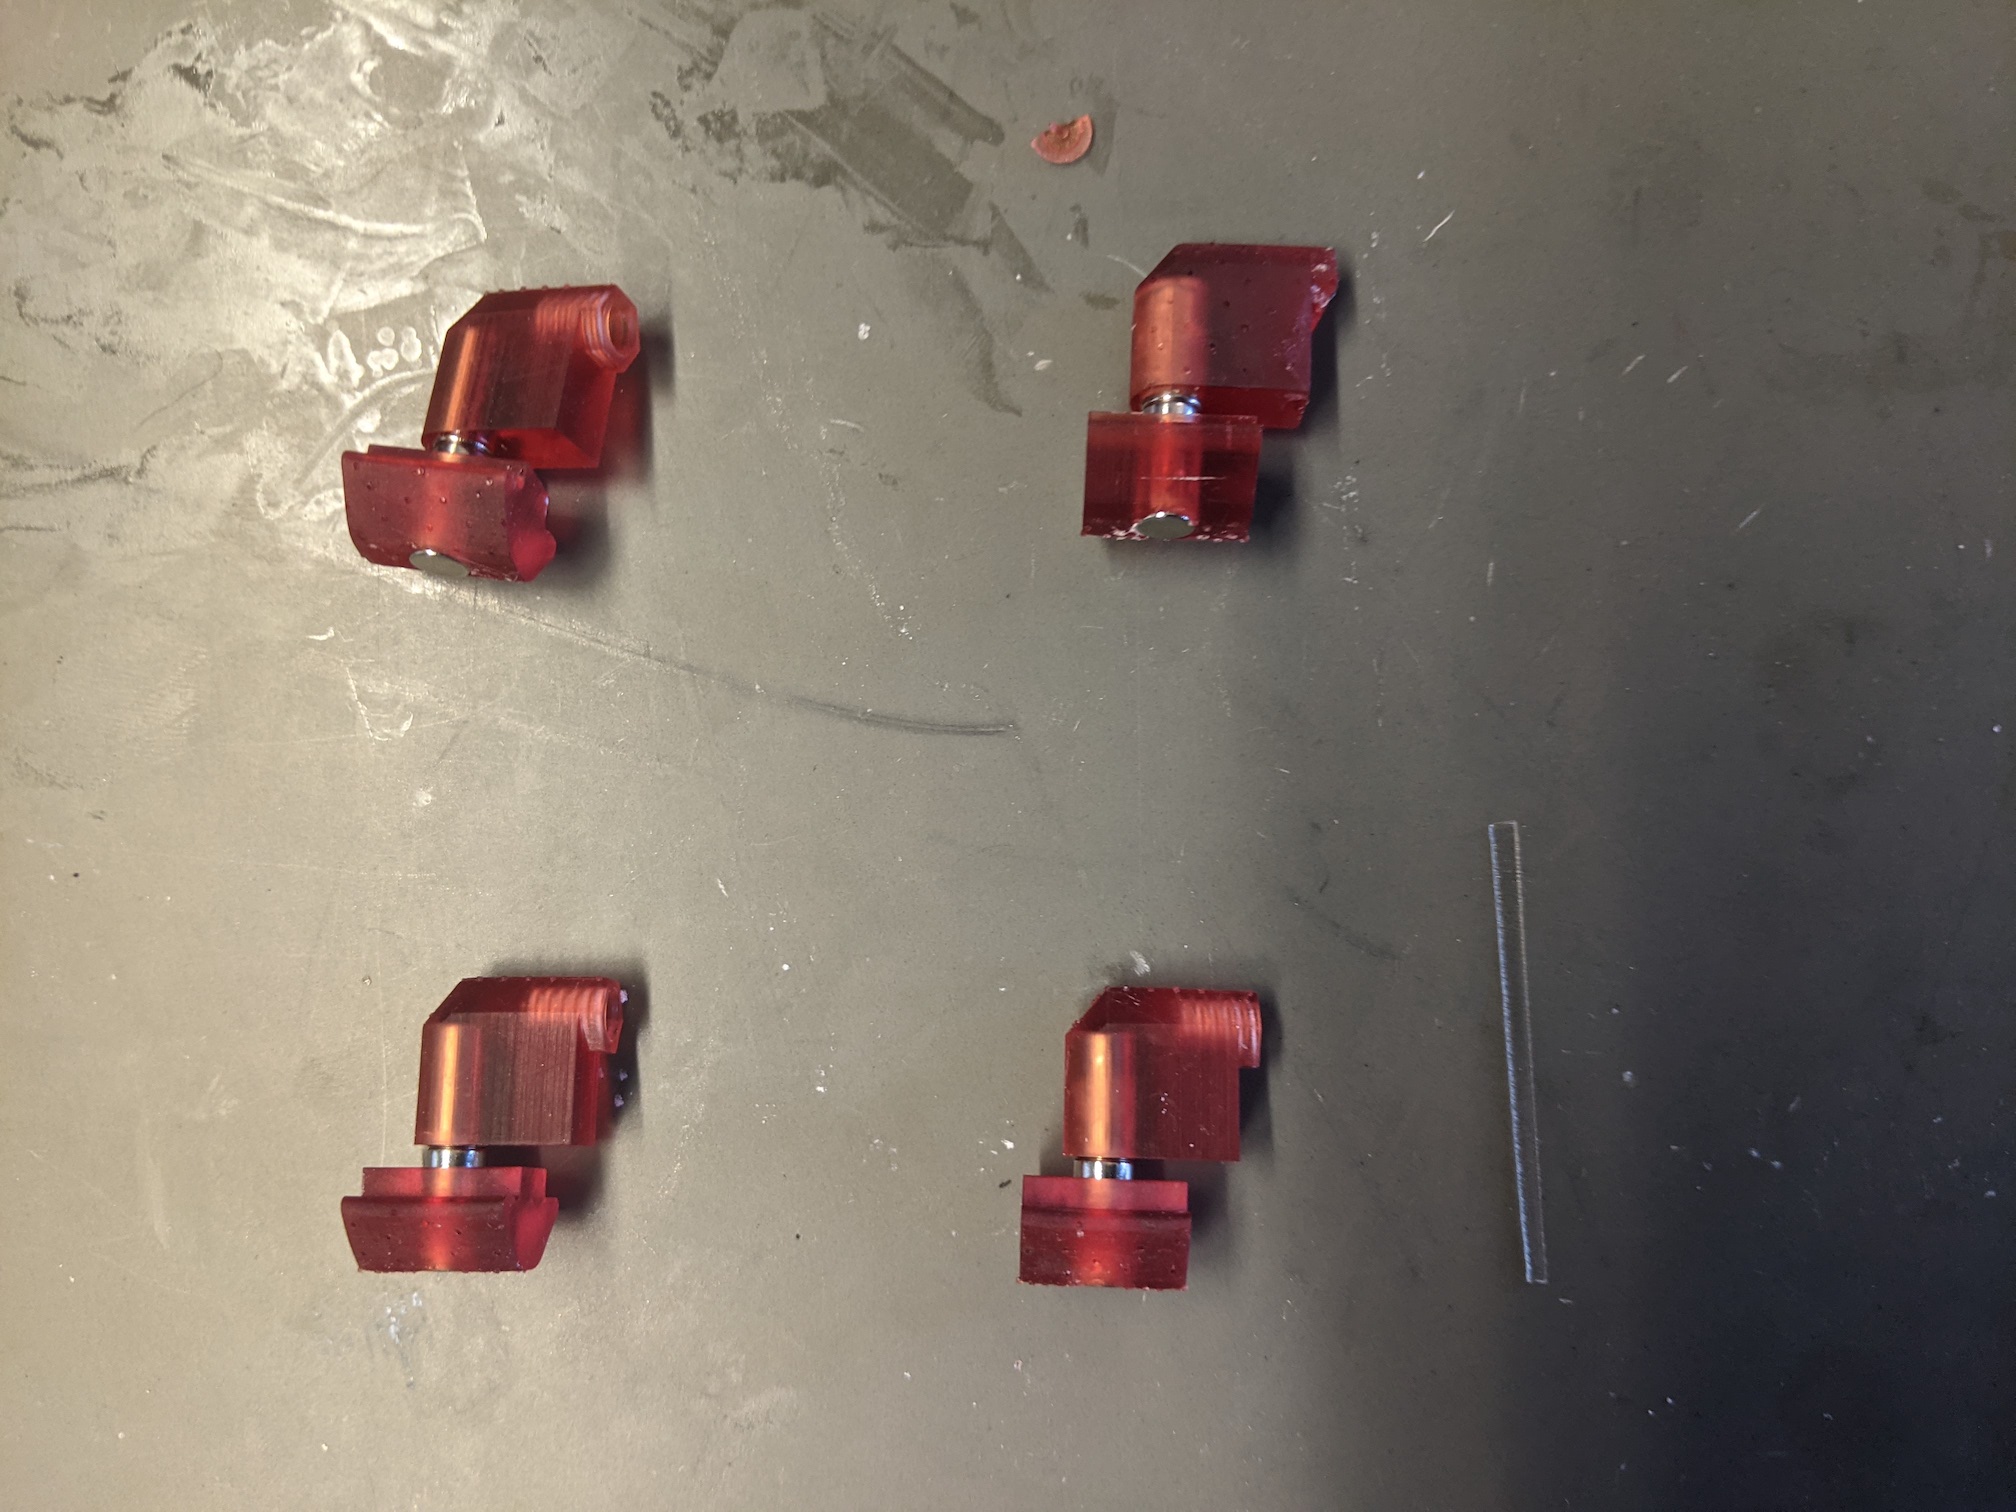
The magnets should fit snugly into the pegs and rails -- ensure that you orient the magnet's polarity in the same direction for all the rail/peg pairs so that the panels can be swapped easily. The pieces should look something like this:
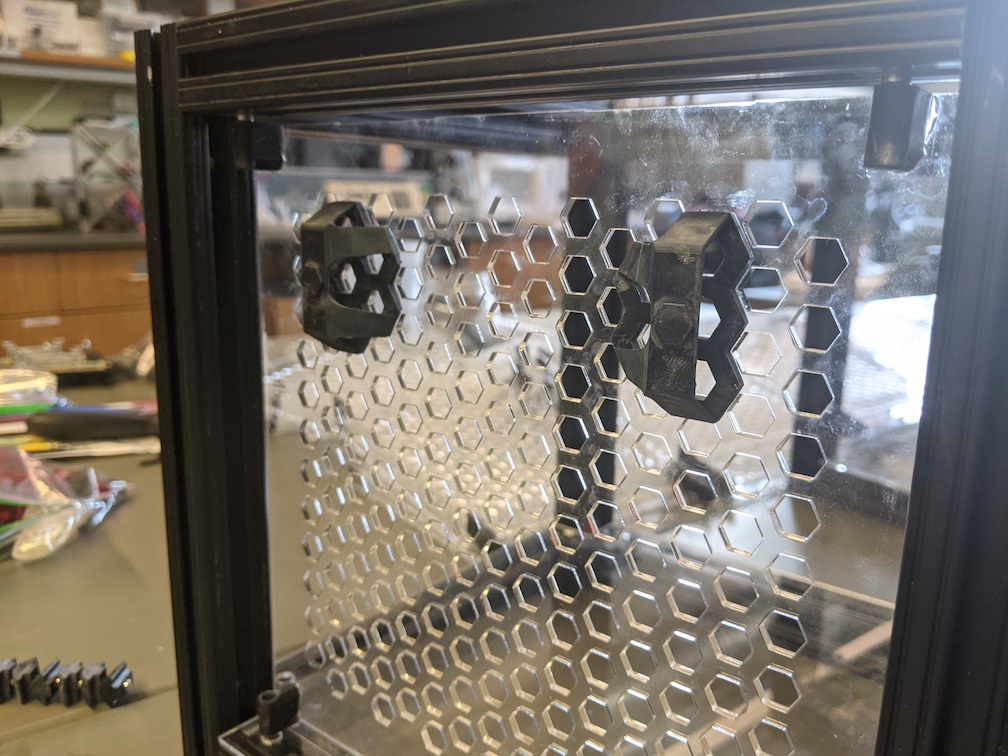
Superglue the pegs into the hexagonal holes in the acrylic panels: two magnet pegs go on the top of the panel, and two solid pegs on the bottom. A small drop of superglue will do -- too much and you will get cloudy residue on the acrylic. We also superglue the handles to the panels -- the exact position doesn't matter, but we have found them easiest to use when two of them oppose one another near the top of the box: that way pulling the panel out with both doesn't strain the acrylic.
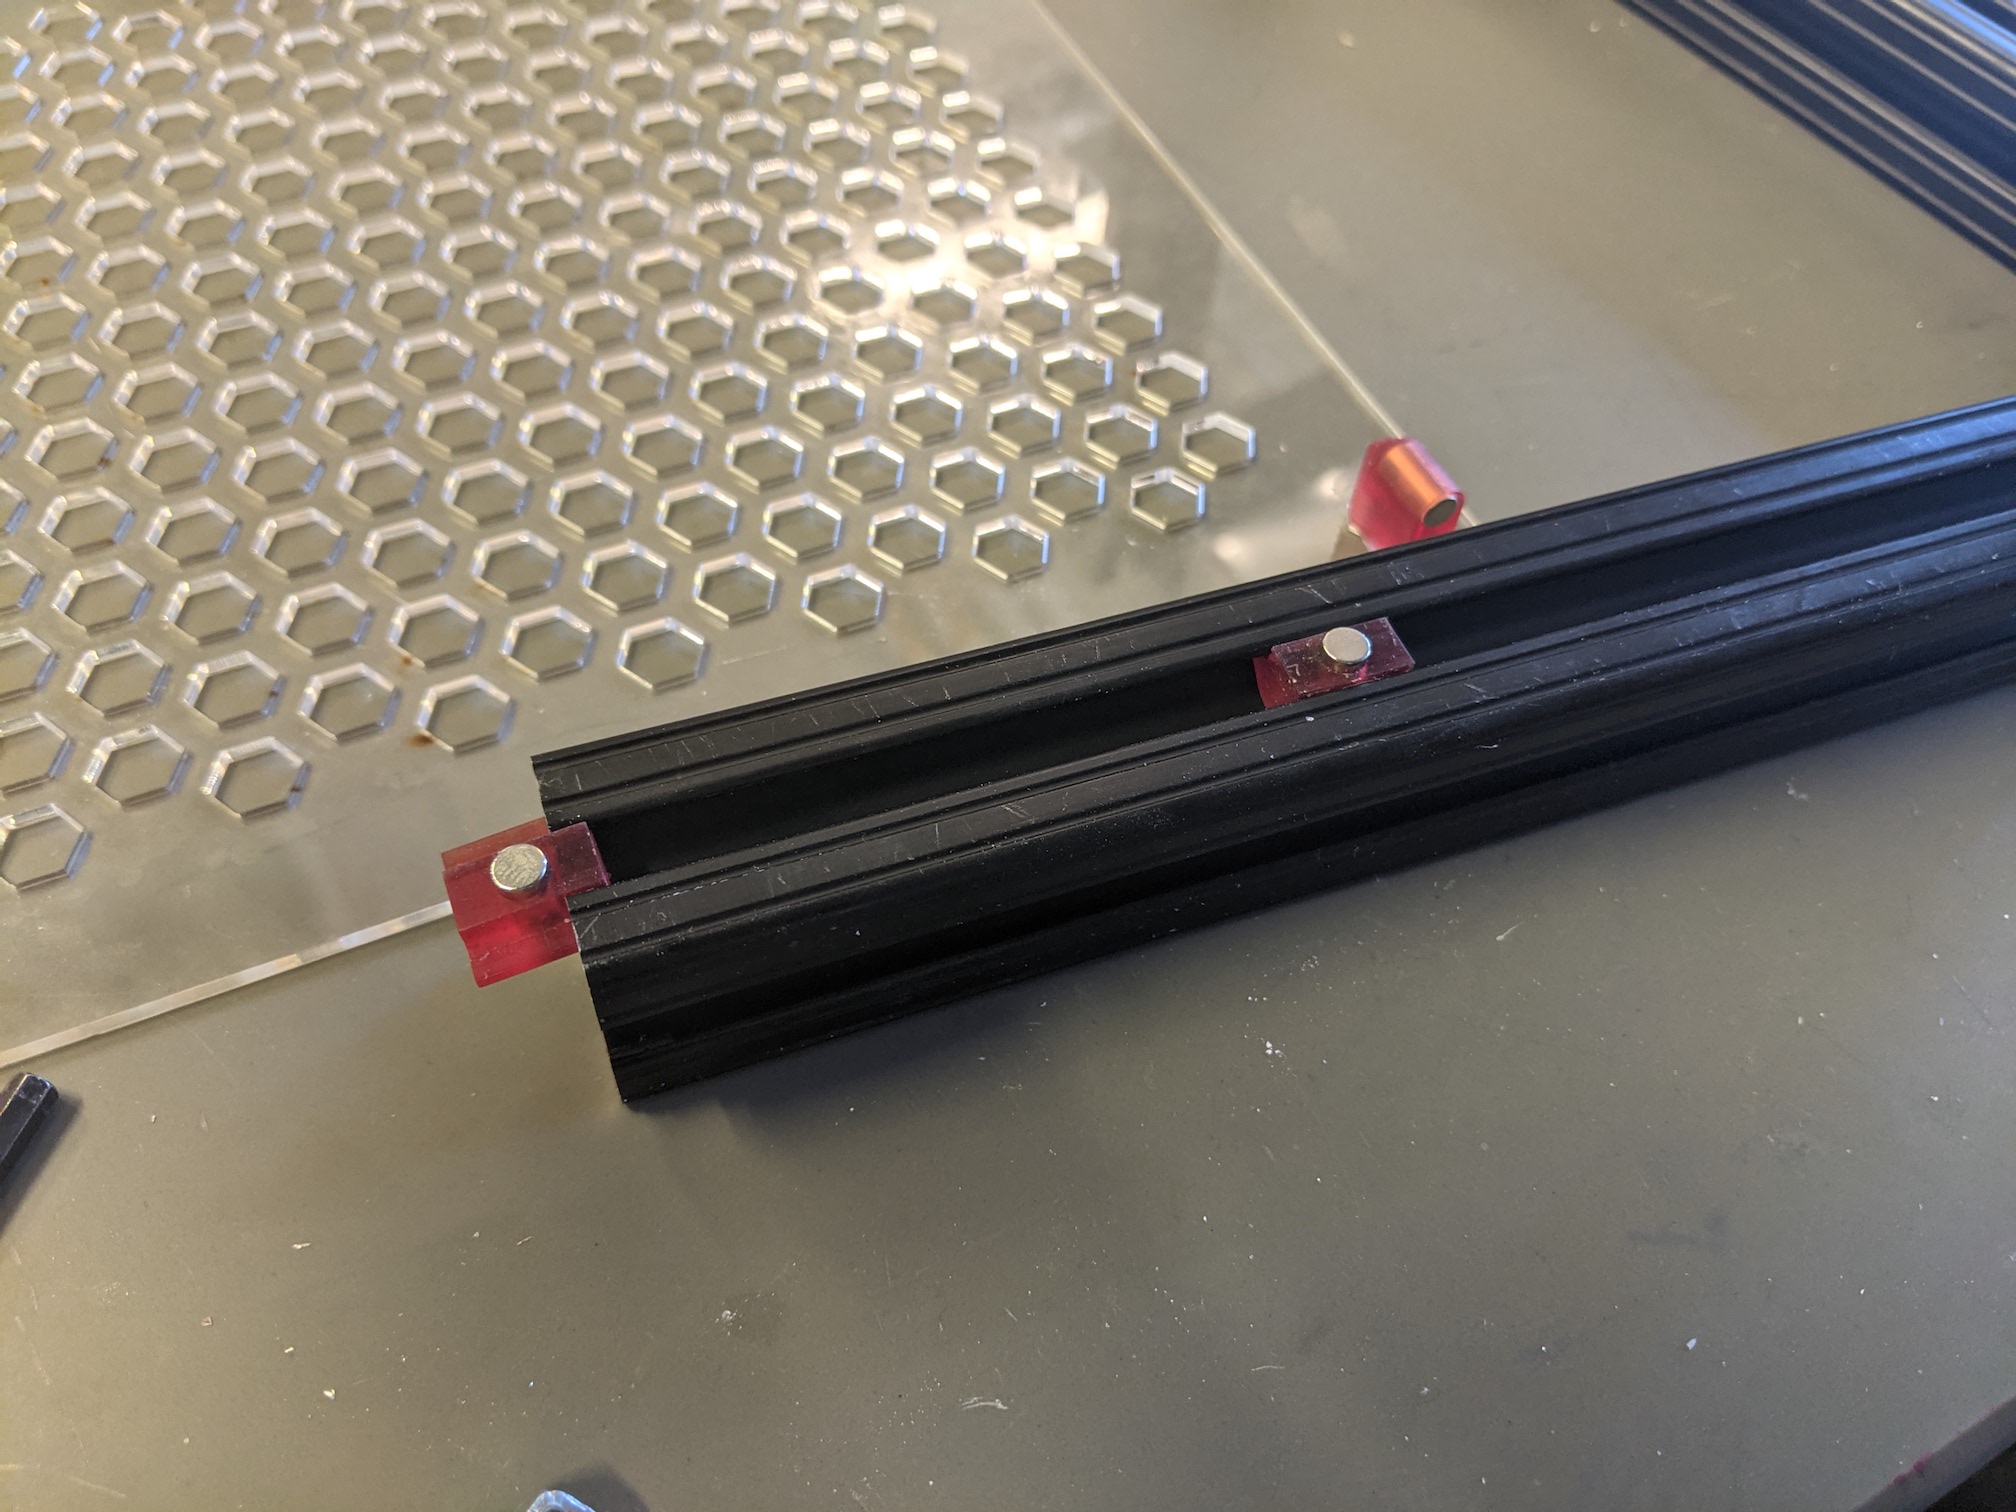
Slide the rail magnets into the rail magnets and get them in rough alignment with the magnetic pegs. You can get the alignment perfect after the box is assembled, but they must be in the rails before the rails get put in place:
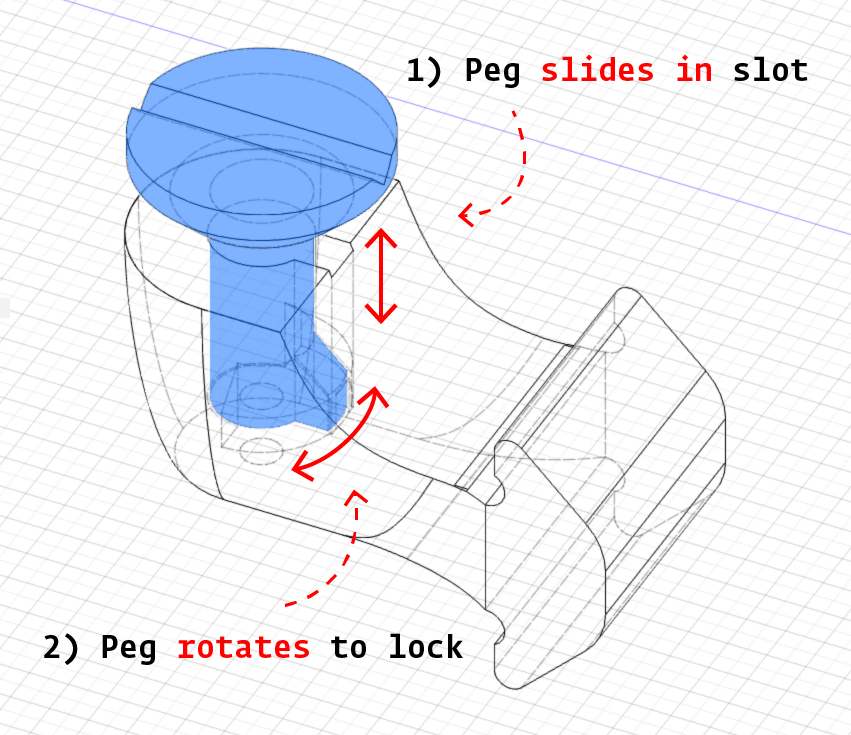
The braces at the top of the box slide into the inside of what will be the top rails with open side facing up:
The pegs slot into the braces like a key, and when turned prevent the panel from being removed.
Tray
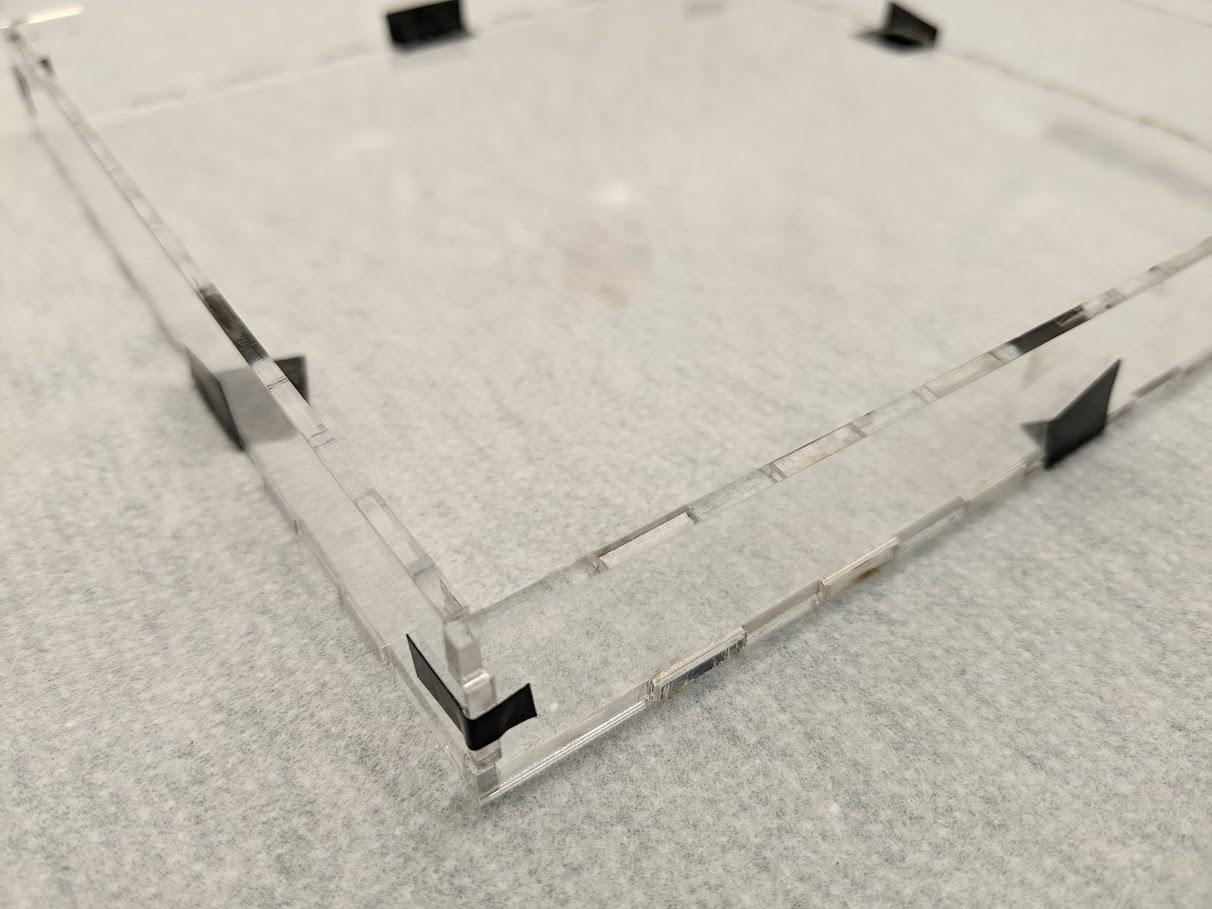
If you want to house animals in these boxes long-term, you probably want to add bedding. A simple way to contain bedding and fluids is to use a tray (Autopilot Tray). Cut the acrylic using the laser cutter, and position the cuts together in a box shape. It is easier to use small pieces of tape as shown in the picture. Then remove one face of the box at a time and weld it using any acrylic weld. You should do the welding in a well ventilated area (e.g., a fume hood) and let the tray sit for at least 24 hours before giving it to mice.
Assemble Boxes
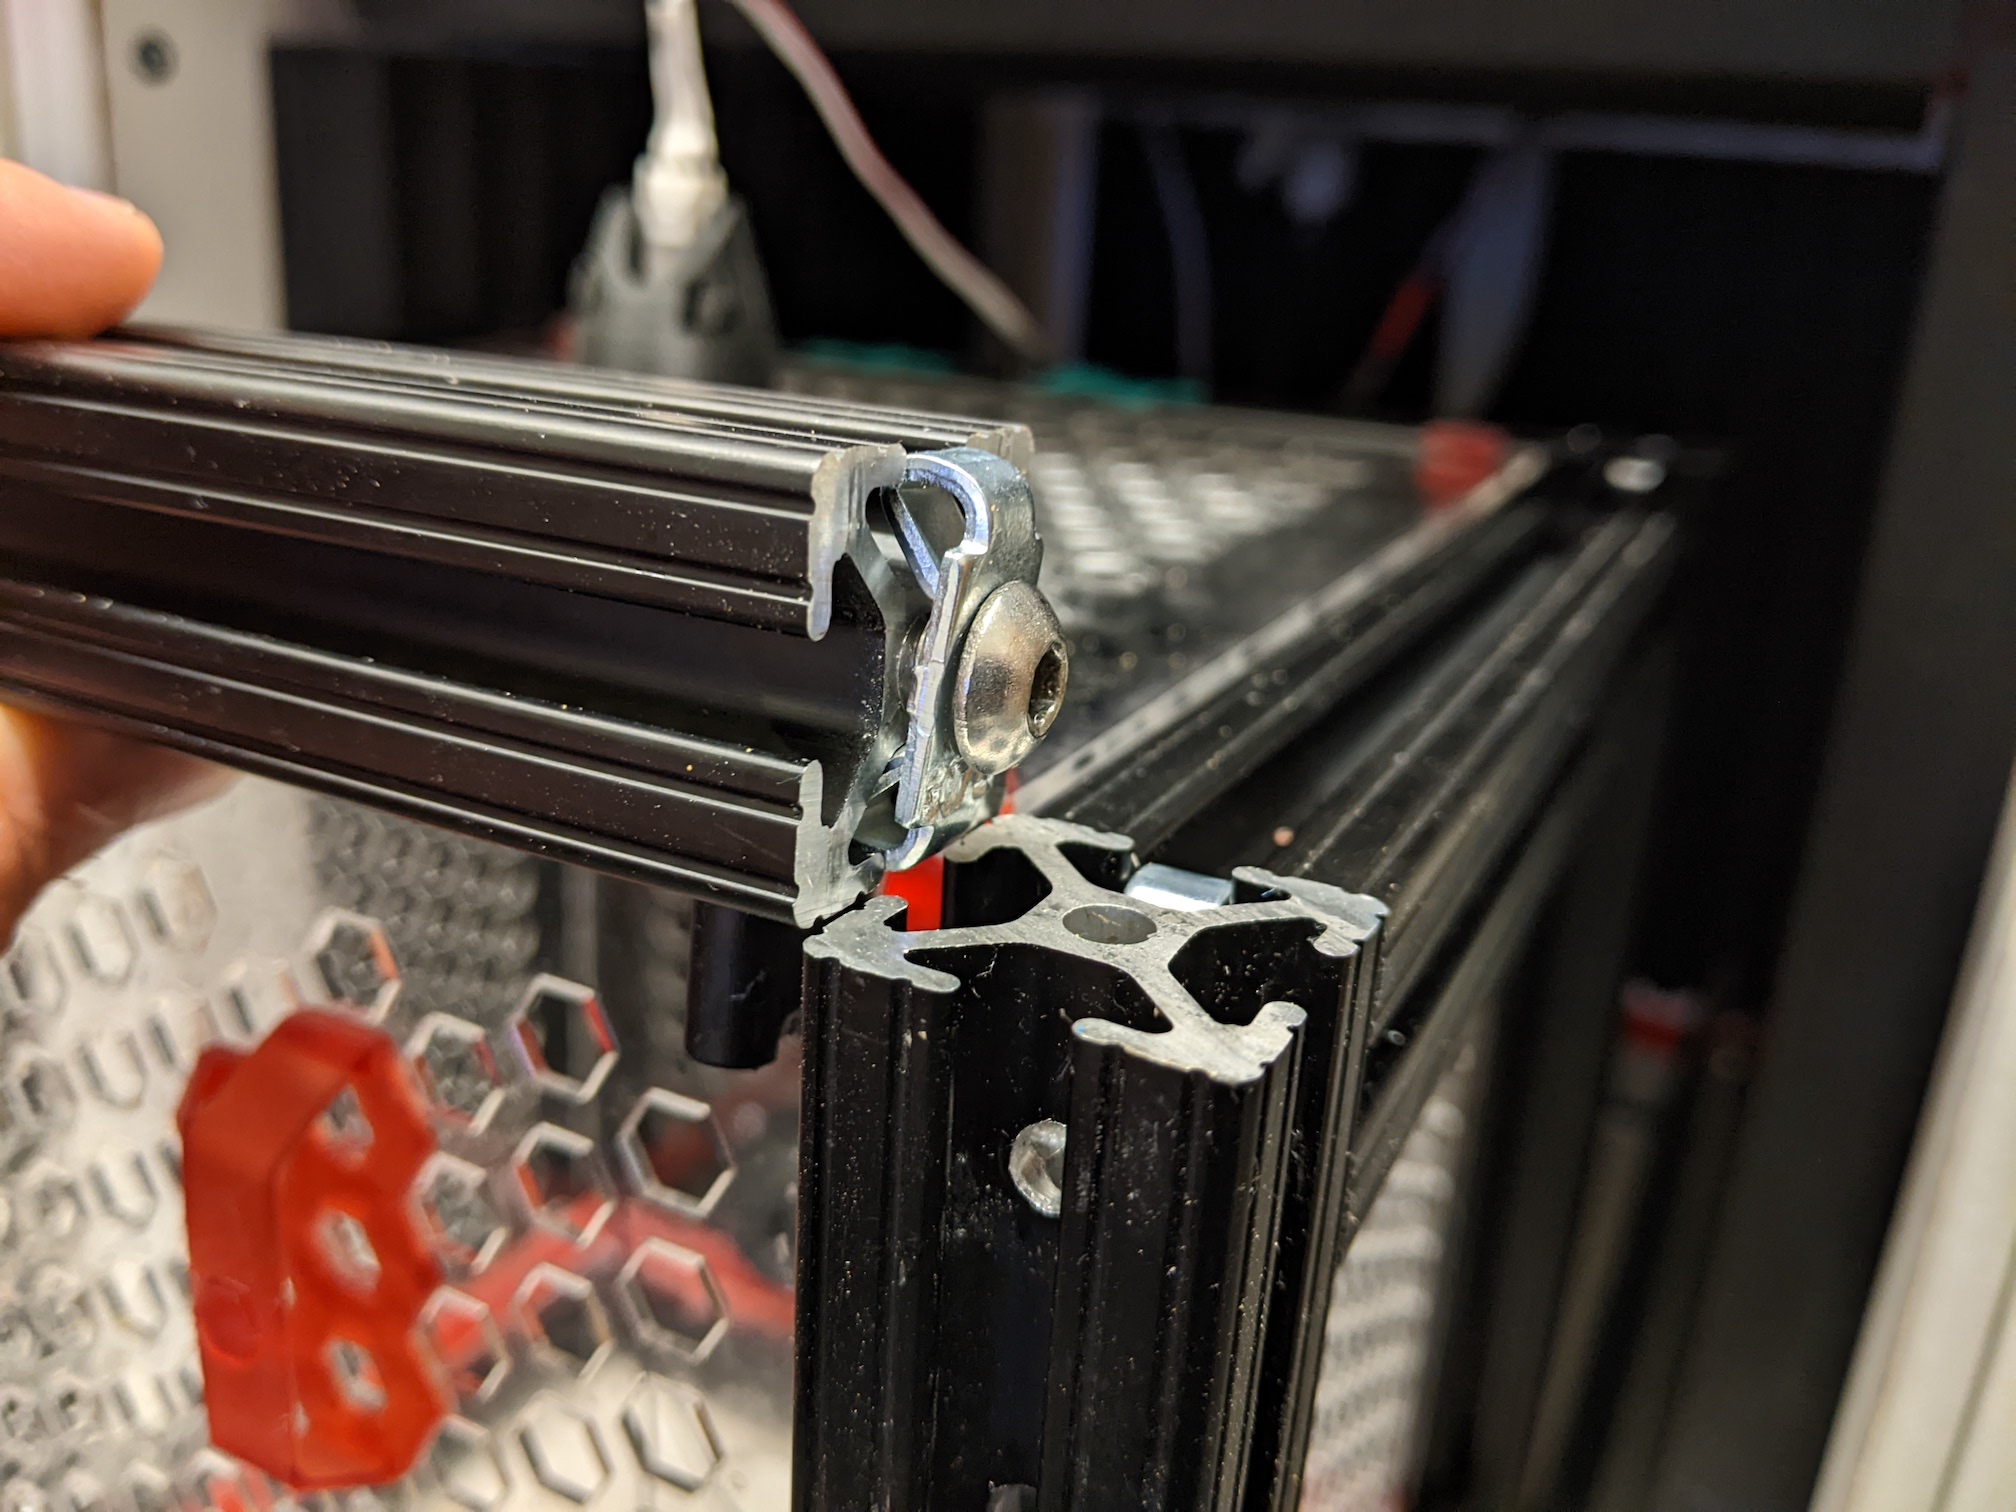
Loosely screw end fasteners on both ends of each of the tapped 8" pieces of 80/20. There is a bit of play with the fasteners inside the rails that can make the rails askew and prevent the box from being a perfect square. Place the 10" pieces vertically on a flat surface, and slide in four of the 8" pieces to form the base. The pieces slide in like this:
Tighten the ends through the access holes one at a time without applying too much torque. Get each of the fasteners just tight enough to hold them in place, and then adjust each to make sure the rails are lying flat on the table.
Slide in the top rails and then flip the box upside down and repeat the process of making sure each of the rails lies flush on flat surface. Once all the rails are aligned, then go back and torque down each of the fasteners to hold them in place.
Success!?
If all went well, your box should be complete! Test it out by clicking the panels in and out a few times, if it's terribly satisfying then you did it right :).
If you end up using this design and figure out some way to improve it, feel free to edit this page or make another!!!
Next Steps
- Build an Autopilot Tripoke to do some experiments!!!
- Build a Triple 5V Solenoid Board and a Multi-Box Gravity-Fed Reward Delivery system to deliver some rewards!!!
- Build some Soundproof Boxes to put the behavior boxes in
Edit History
(also see the history page)
- 22-08-22: Updated the D38 magnet to the correct D36 magnet, since the D38 was too long.
